BEFORE INSTALLATION
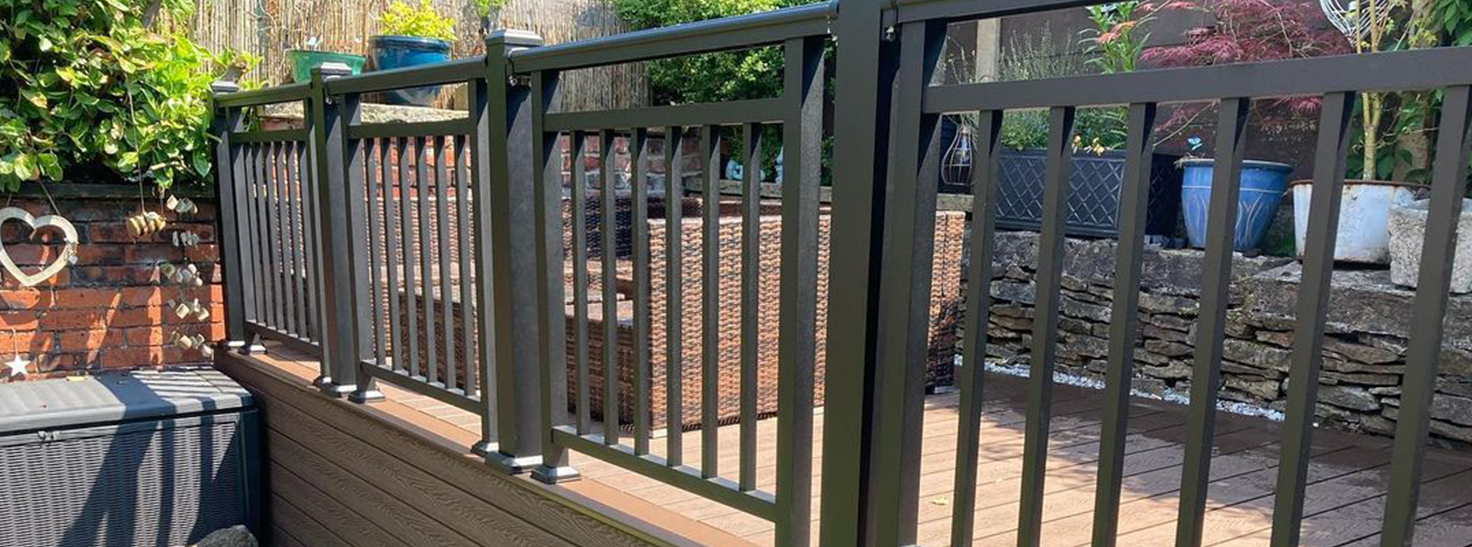
BALUSTRADE SYSTEM
Cladco balustrade systems are the perfect addition to your Cladco Signature composite, ProDeck, timber and Nordeck decking boards. They are easy to install and benefit from a non-corrosive and durable finish.

STORAGE AND CARE
Balustrades should be kept dry and protected from the elements prior to installation. It is recommended to store inside. If the balustrade is stored outside, keep it covered with plastic sheeting or tarpaulin. We recommend that at least two physically capable persons assist with carrying and moving the balustrade.
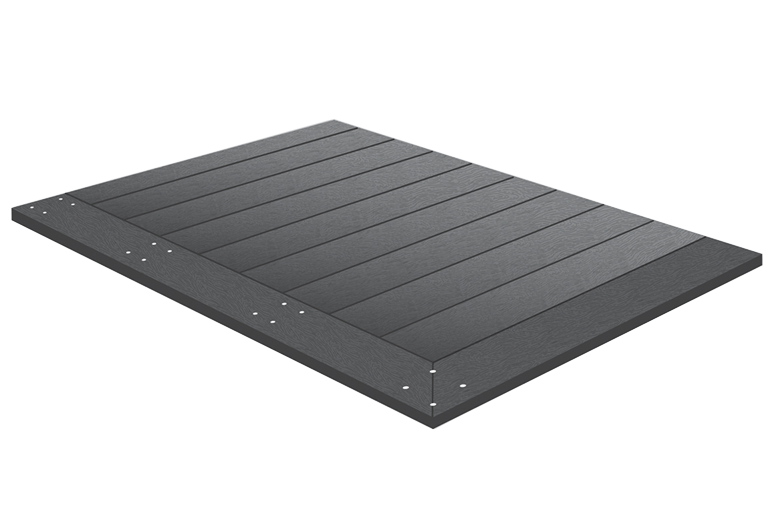
SOLID OR BULLNOSE BOARDS
Please note that we recommend installing the balustrade onto a solid or bullnose board supported by joists underneath.
MEASURE
Measure the width of the area to be covered, mark out where the posts will be installed, and ensure the balustrades are purchased in the correct size for your project.
TOOLS AND HANDLING
PROTECTIVE EQUIPMENT
When handling or carrying the balustrade it is advised to wear long sleeves and gloves. If cutting is required, we recommend wearing a protective mask, ear defenders, and safety glasses. Always refer to the HSE website for further guidance before installation.
MEASURE
Measure your decking area to determine how many handrail sections you will need. Balustrades are available in widths ranging from 900mm to 2600mm. When positioning the posts, ensure you measure the length of the handrail on the balustrade accurately.
POWER DRILL OR IMPACT DRIVER
When installing the balustrade system, 8mm pilot holes are required when fixing into a bullnose or solid board. We recommend using an impact driver for easier drilling; however, a standard power drill may also be suitable.
SPIRIT LEVEL AND STRING
Use a spirit level to ensure posts are installed vertically, particularly on sloped decking areas, and that the handrail sections are level. String can be used as a guideline to keep posts evenly spaced and aligned with the edge of your decking area.
STORAGE AND HANDLING
Before installation, store the balustrade system in a cool, dry area, ensuring nothing is placed on top or leaning against the product.
PAINTING
Cladco aluminium powder-coated balustrade can be repainted to either complement or contrast your decking. Apply one coat of primer as a base, then use a solvent-based spray paint to achieve an even, professional finish.
INSTALLING THE BALUSTRADE
1
Start by marking out positions of each post on your decking area, using string as a guideline to ensure they are correctly aligned. It is recommended to begin at one corner and mark each post at intervals that match the spacing of the balustrade handrail.
Once marked and double-checked, pre-drill 8mm pilot holes for the posts, but do not install them at this stage.

2
Install the first post, ensuring it is level, and securely fix it into the existing pilot holes. It is recommended to use a coach bolt, inserted to a minimum depth of 60mm into the post for a secure fit.
Please note: The balustrade post must be installed above the joist frame system, as it cannot be fixed directly into a decking board. Ensure all four screws are securely in place.

3
The fixings will be concealed by the post foot caps, which can be placed over the top to hide them.
The foot caps can be installed either during the installation process or once it is complete. They should snap into place to provide a secure and seamless finish.

4
Posts are supplied with a post cap, which simply slots onto the top of the post. Once in place, secure the cap by screwing it into the post using either a black-coated screw or a screw painted to match the balustrade.

5
Ensure the balustrade is securely positioned against the post and that it is level. Once you are satisfied with the alignment, mark the screw positions to create pilot holes. Pre-drill 8mm pilot holes, then reposition the balustrade and fix it in place.

6
Ensure the balustrade is level and that the pilot holes are correctly aligned. Make sure to slide the fixing bracket onto the handrail before securing the balustrade in place, as this cannot be added once the handrail is installed.
Securely fix the balustrade section into the existing pilot holes using the same coach bolt method as used for the posts. Finally, cover the fixings with the supplied foot cap, as shown in the diagram.
7
Install the next post following the instructions above. Ensure the fixing bracket is fitted onto the handrail before securing the post in place, as it cannot be added once the post is installed.

8
Install the handrail section to the post by screwing the fixing bracket directly into the post, as shown in the diagram. Conceal the screws using the supplied fixing bracket cover.

CORNER INSTALLATION
Corner sections are created by fixing two balustrade sections at right angles to two adjacent sides of the corner post. Install the balustrade sections following the instructions outlined above.

INSTALLING THE GATE SECTION
When installing your gate make sure the height of the gate and the height of the handrail are level with each other.


We recommend using the following latch and hinge products for installing the gate section:
INSTALLING THE STAIRS SECTION

The flexi joiner can be used to connect the balustrade handrails to the balustrade stairs. This component slots into the raw edges to seamlessly join the two sections, creating a smooth, continuous transition.
Use our balustrade end cap to seal the ends of your balustrade handrails. These rubber caps are easily secured with adhesive, providing a clean and professional finish to the edge of the balustrade.
AFTERCARE AND MAINTENANCE
BALUSTRADE MAINTENANCE
Cladco Balustrade Systems require minimal maintenance thanks to their durable aluminium base and powder-coated exterior. However, it's important to regularly check the condition of your balustrade to ensure it remains in good shape. We recommend the following:
- Clean regularly using a standard, non-abrasive cleaning detergent.
- Always use a mild cleaning solution to protect the powder-coated finish.
- Inspect your balustrade monthly, or more frequently in areas with harsh weather conditions.
IMPORTANT NOTE: Avoid using abrasive or chemical cleaning products, as these can damage the powder-coated surface and reduce its lifespan. Do not use scrapers or harsh tools that may scratch or harm the finish.
MOULD AND MILDEW
Mould and mildew are common in outdoor environments, especially in shaded or damp areas. To minimise build-up:
- Remove mould as soon as it is noticed.
- For light mould, simply wipe the area down.
- For more stubborn grime, gently scrub using a mould and mildew cleaner that is safe for powder-coated surfaces.
SALT AIR OR POLLUTION
While the aluminium frame and powder-coated surface are rust-resistant, prolonged exposure to salt air or pollution can lead to corrosion over time. In coastal or heavily polluted areas:
- Wipe down the balustrade regularly with fresh water to remove salt and pollutants.
- Continue to inspect for any signs of damage or corrosion.
SURFACE SCRATCHES
Surface scratches or general wear and tear may chip the powder coating, exposing the aluminium underneath to the elements. To help prevent this:
- Avoid placing sharp or heavy objects against the balustrade.
- If scratches occur, touch them up using appropriate paint to reseal and protect the affected area.
FAQS
A balustrade is a railing, or support system forming a divide between one area and another. This divide can be for safety, or aesthetic reasons. Balustrades can often be installed at the edge of a raised area such as a veranda or balcony and can be used as a prevention to stop people from falling over the edge. Balustrades are available in a range of materials, including timber, metal, composite and glass.
The term ‘balustrade’ originates from 17th-century Italian architecture, where ‘balusters’ referred to the small columns used in railings. Today, a balustrade refers to a row of balusters (posts) topped by a rail, forming a low parapet or barrier. It is often used to improve safety and define boundaries around elevated areas such as balconies or raised decking.
The word Balustrade has 17th-century Italian origins, when the word ‘balusters’ referred to the columns used in traditional Italian architecture. Today, Balustrade means a row of balusters (posts) topped by a rail or a low parapet or barrier, designed for safety around areas such as raised deckings or balconies.
Balustrades can be made out of a variety of materials such as powder coated aluminium, timber, metal, composite or glass. A Balustrade simply creates a protective or aesthetic divider between one area such as a balcony and the surrounding other areas. To install the Powder- Coated Aluminium Balustrades, please follow our Installation Guide.
Choosing the right balustrade material depends on your design preferences, maintenance expectations, and performance needs. Cladco offers a premium powder-coated aluminium balustrade, designed for durability and strength. Compared to timber, glass, or composite alternatives, our aluminium system requires minimal maintenance and offers long-lasting performance.
One of the key advantages of our aluminium balustrade is that it can be painted, allowing it to complement any design scheme.
- Timber balustrades, while traditional in appearance, typically require regular upkeep and have a shorter lifespan.
- Glass options offer a modern aesthetic but demand frequent cleaning and maintenance.
- Composite and wire alternatives may vary in strength and durability.
Cladco’s aluminium balustrade is designed to stand the test of time, offering both style and strength without the need for ongoing maintenance.
Visit the product page for more information.
A staircase balustrade is a railing system designed to run alongside a staircase, providing both safety and visual definition. It is often referred to as a ‘banister’ by architects and interior designers. While balustrades are commonly used externally on composite decking projects, a staircase balustrade can also help to secure raised areas or create a visual divide between different sections of an outdoor space.
To discuss installing a staircase balustrade system, please contact our helpful Sales Team on 01837 659901, who will be happy to advise on the best solution for your project.
Balustrade post spacing can vary depending on the material and thickness of the components used. However, with Cladco Balustrades, there’s no need to calculate spacing manually. Our balustrades are designed and manufactured as complete sections, meaning no self-assembly or spacing measurements are required—simply install each section between the posts.
We offer a range of handrail widths, from 1000mm to 2600mm, all at a standard height of 1100mm, providing flexibility to suit a variety of projects.
Balustrades can be easily fitted toCladco Solid Signature Composite Decking, ProDeck, or Nordeck Boards. For best results, refer to our step-by-step installation guide, which provides clear and easy-to-follow instructions.
A balustrade system consists of vertical posts (balusters) connected by either horizontal or vertical infills, typically topped with a handrail for added comfort and safety. Balustrades are often used around decking, balconies, or staircases to create a boundary and prevent falls.
A handrail, by contrast, is a single, continuous component designed to be gripped by hand for support—commonly found along staircases or corridors. It does not include posts or infill sections.
Cladco balustrade systems incorporate a powder-coated aluminium handrail across the top, designed to be easy to grip and visually cohesive with the rest of the system.
In some cases, planning permission may be required—particularly if the balustrade is part of a project considered ‘out of character’ or potentially detrimental to the local environment, or if it is being installed in a conservation area.
If you are unsure, we recommend consulting your local planning authority, building surveyor, or local council before beginning any work.
Aluminium is a highly durable and corrosion-resistant material, making it an ideal choice for outdoor installations. Unlike other metals, it will not rust over time. While aluminium balustrades are less likely to scratch, any surface damage that does occur may affect the protective coating. If this happens, we recommend touching up the area with paint as soon as possible to maintain the integrity of the finish.
The powder coating on aluminium Balustrades is a thick, dense finish, providing the Balustrade with a durable long-lasting finish. With a number of benefits:
1. The thick coating protects the material from scratching, fading and rusting.
2. The coating can be applied quickly and easily, only one coat is necessary to see results.
3. Colours or other custom finishes can be added to the powder coating for a unique and stylised protective look.
4. Powder-coated aluminium Balustrades produce less volatile organic compounds than alternative finishing processes, making it more environmentally friendly.
5. As the powder coating is applied using a heated spray, an even finish across all surfaces occurs with no drips or traces of application. A smooth, seamless finish.
Cladco aluminium balustrades are stronger than timber or composite options, and are not susceptible to rotting, warping or splintering. Toughened glass balustrades offer similar strength, however require ongoing care and maintenance. Cladco balustrades are a superior choice of balustrade, offering peace of mind when installed on any project.
Cladco Powder-Coated Aluminium Balustrade Systems can be painted in any colour you like, to complement or contrast your property.
Balustrades are corrosion resistant and do not need to be painted, sealed or varnished like traditional timber balustrades. Cladco Balustrades require less maintenance overall than alternatives such as glass.
If you’re pairing the Balustrade to your Composite or PVC Decking, the Balustrade material offers a superior look and will finish off the decking area to a high-end standard. The low maintenance material means there is no need to constantly clean or maintain it as you would with a glass balustrade.
Airflow can travel freely with Cladco Balustrade unlike solid sections of glass or timber. The design of the Balustrade ensures high winds will not affect the stability.
The Powder-Coated Aluminium Balustrade sections are simple to install, with full fixing and Installation Guides available.
Unlike glass materials, aluminium is easy to cut to size, any competent DIYer should be able to fix and install the Balustrade with relative ease.
Unlike timber, where the colours can vary and fade over time, aluminium colours stay uniform and will not fade over time.
Unlike glass, which will show smudges, finger marks and dirt easily, aluminium Balustrades do not require regular cleaning.
Cladco aluminium balustrades are well-suited to coastal environments. Aluminium’s natural corrosion resistance means it will not suffer the same damage as steel or timber when exposed to sea air. This makes it a reliable choice for seaside installations.
Repainting powder-coated aluminium can help refresh the appearance or match your balustrade to a new design scheme. Follow the steps below to ensure the best results:
Step 1: Clean the Substrate
Begin by removing any grease, dirt, or debris that may prevent the new coating from adhering. This can be done using a sponge and soapy water, or, for heavier build-up, by pressure washing with an alkaline-based degreasing detergent. Ensure all cleaning products are thoroughly rinsed off and allow the balustrade to dry completely.
Step 2: Remove Corrosion
If the balustrade is older, you may notice corrosion on the powder-coated surface. A white, chalky residue is a sign of oxidation and must be removed before painting. Use a nylon scouring pad or a power sander to remove any corrosion and expose a clean, smooth surface. Be sure to clear away all dust and debris before continuing.
Step 3: Abrade the Metal Surface
To ensure proper adhesion of the new paint, the gloss of the existing powder coating must be removed. Lightly sand the surface to create a key for the new coating. If some powder coating remains, feather the edges to avoid ridges or bumps. After sanding, clean the surface thoroughly to remove all dust and residue.
Step 4: Mask Off Adjacent Surfaces
Use decorators' tape, masking paper, or protective sheeting to cover any areas that should not be painted. This helps prevent overspray and keeps adjacent surfaces clean and protected.
Step 5: Prime the Substrate
Once the surface is clean, dry, and free from rust, apply a suitable primer. It’s important to do this promptly to avoid oxidation. Choose a primer that is compatible with aluminium and any specific alloy used. Test a small area first—if the primer wipes off easily, further surface preparation is required.
Step 6: Spray Apply the Top Coat
Choose a top coat specifically formulated for aluminium or powder-coated surfaces. These are available in various colours and gloss levels. The top coat can be spray-applied for an even, professional finish. If you're unsure, a professional spray-painting service will ensure the correct materials and application methods are used.
Need Help?
For advice on repainting your Cladco aluminium balustrade system, feel free to contact our Sales Team on 01837 659901.
Discover our range of Balustrade handrails & gates online today.
