CLADCO SIGNATURE COMPOSITE DECKING AND JOISTS
Installation Guide, Aftercare and FAQs
Important Advice Prior to Installation
BEFORE INSTALLATION
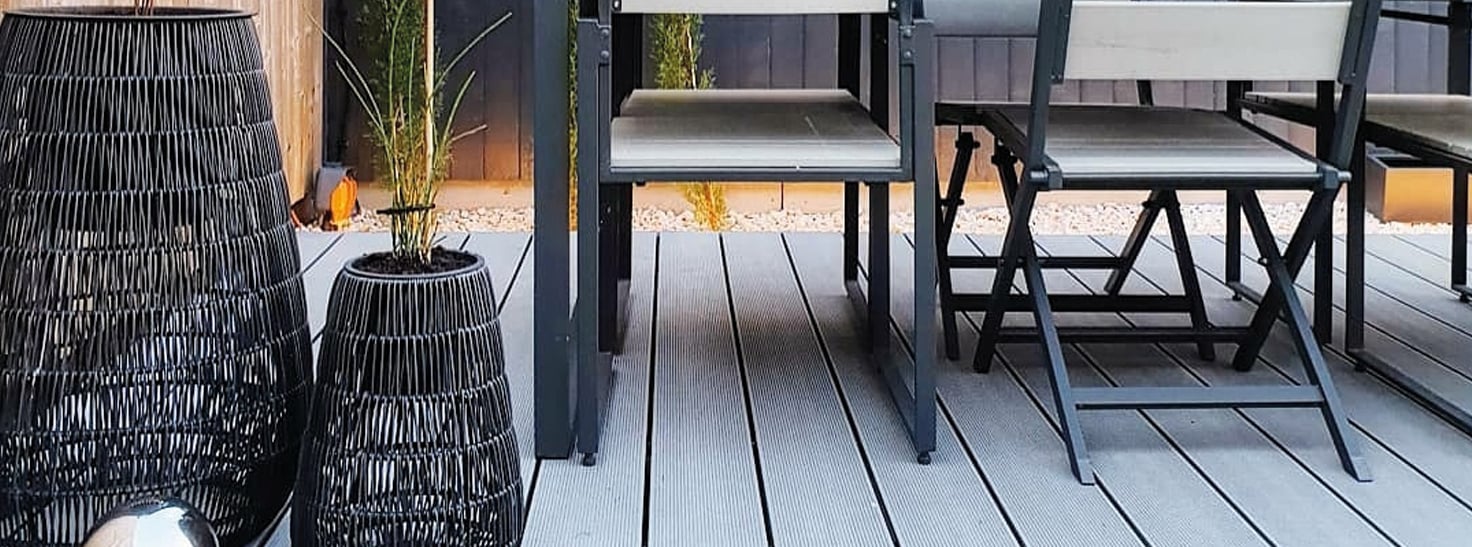
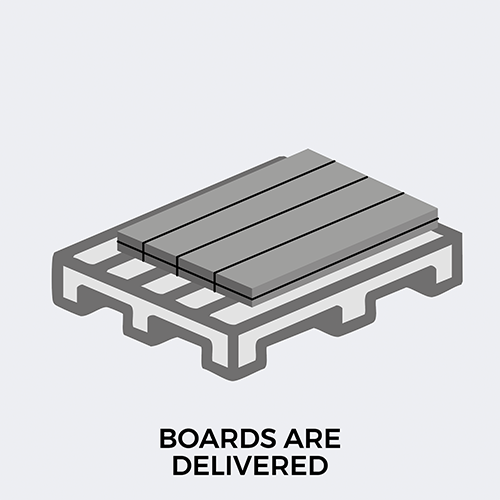
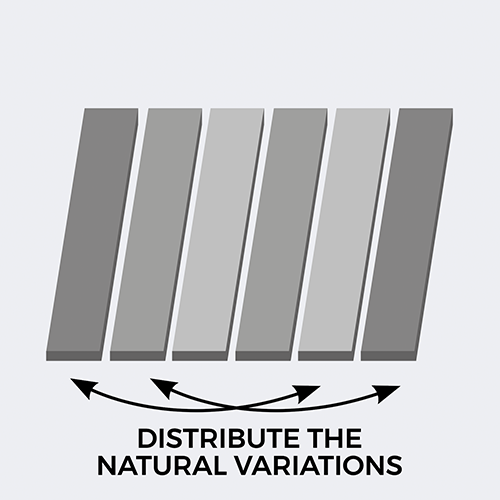
For a balanced and visually appealing result, we recommend laying out all composite boards prior to installation. This will help evenly distribute the natural tonal variations across the product.


STORAGE AND HANDLING
Cladco Signature composite decking boards should always be stored in a cool shaded spot on a flat and level surface which supports the whole length of the Board. It is recommended to store the boards on a pallet to ensure they are not sat directly on wet or cold ground. Boards should be stored properly until they are ready to acclimate.
Wear protective gloves when handling the boards and take care when lifting them. We recommend that a minimum of two physically capable persons carry the boards. Always ensure anyone assisting with installation or handling is physically capable.
BOARD COLOUR VARIATION
Cladco Signature composite decking is made with a combination of materials, including wood, making it a natural product that will exhibit colour variations. As a result, the colour will differ between boards, even when ordered at the same time. You may also notice slight colour differences within a single batch. Orders purchased at different times will display noticeable shade differences.
Products purchased together but then split into two separate projects will stabilise at different rates. For example, if an area is installed and extended sometime later, variations may occur within the boards, even if they come from the same batch. If these boards are used across multiple projects, the stabilisation process will vary for each set, leading to differences in appearance over time.
Our range of composite decking is designed and manufactured to mimic the natural grain and colour variations found in real timber decking. To ensure a balanced and visually pleasing result, we recommend laying out all the boards before installation to evenly distribute the natural variations across your decking area.

15 YEAR WARRANTY
Our signature composite decking is supplied with a 15-year warranty, subject to terms and conditions. We recommend installing onto our recycled plastic decking subframes and in accordance with our installation guide to qualify for the extended 15-year warranty. Signature decking boards should be installed as per this installation guide, and failure to do so may invalidate the warranty.
For further information see our terms and conditions.
DOUBLE JOISTS AND FIXING CLIPS
Please note that double joists must be installed at butt joints to provide adequate support for each board end. Additionally, fixing clips must be used at each board end, and boards should never share a fixing clip.
Adhering to these guidelines will help ensure proper installation and longevity of your decking. Failure to follow these guidelines will invalidate the product warranty.
COLOUR STABILISATION
All Cladco composite products contain UV stabilisers; however, due to their natural elements, all composite products will undergo an initial colour stabilisation process. This may result in some changes in colour during the first few months after installation as the product acclimatises to the environment.
TEMPERATURE GUIDE
Cladco Signature composite decking boards will naturally expand and contract with changing temperatures. To account for this, it is essential to follow our recommended guidelines when installing boards, particularly where two boards meet end-to-end at butt joints.
Spacing guidelines for butt joints:
- 7mm spacing at temperatures of 5°C and below
- 6mm spacing at temperatures between 5°C and 15°C
- 5mm spacing at temperatures of 15°C and above
Tools
PROTECTIVE EQUIPMENT
When handling or carrying decking boards, it is advised to wear long sleeves and gloves. When cutting the boards, we suggest you wear a protective dust mask, ear defenders and safety glasses. Knee pads are recommended to be worn when fitting decking.
TOOL SET
Standard everyday carpentry tools will be needed to complete the installation, including a tape measure, pencil, spacing tools and stanley knife.
POWER DRILL OR DRIVER
Standard power drills can be used when installing Signature composite decking boards. A standard Phillips screwdriver bit PH2 x 65mm should be used when working with SPEEDDEKZ decking screws.
CLADCO ADHESIVE
We recommend using Cladco adhesive to secure composite trims when concealing a support system beneath. When using the adhesive, do not allow the adhesive to get on the decking boards, as this can damage the finish of the deck.
JIGSAW OR HANDSAW
Signature composite decking boards can be cut using any standard wood cutting tools. We recommend using a fine-toothed blade to get the cleanest finish to your cut edge.
SPIRIT LEVEL AND STRING
A spirit level is essential when installing decking boards to ensure a level support system. A spirit level ensures the decking boards are installed along a straight edge. A slight slope will allow for water run-off.
Prepare Your Base
CHOOSE FROM TWO BASES

CONCRETE BASE
A 100mm thick concrete base is recommended, with a slight slope for drainage to occur. The optimum slope should be around 5mm for every metre.

GRASS OR SOIL BASE
Remove the turf or soil until the ground is completely even, ensuring to remove any debris or rocks from the area. Cover the area of your site with a layer of weed mat to prevent any weed regrowth coming up under your decking.
If you need to overlap the weed mat, ensure you do this with enough fabric to prevent any gaps. Once cut and pinned into place, cover the weed mat with your desired coverage, such as chippings, bark or stones, so that none of the material is exposed.
AIRFLOW
Ensure your substructure design allows for significant airflow and ventilation. If the decking is being installed in areas with poor ventilation, it must be installed on top of a substructure that allows for an airflow gap of 30mm for composite joists and 50mm for both structural composite joists and recycled plastic joists.

Recycled Plastic Framework

1
Recycled plastic joists can be installed directly over grass ensuring that weed mat is laid underneath. Alternatively, a raised substructure can be installed using recycled plastic posts. The maximum recommended space between joist rows depends on the angle at which you intend to lay your boards in relation to the joists, but should never exceed 400mm, please see diagram.

2
Starter clips need to be fixed to the end of the joists before laying the first board. Place these at the end of each joist, leaving a gap of 15mm between the wall and the starter clip to allow for expansion.

3
Our composite boards are easily fastened to the joists of a supporting substructure with the help of our stainless steel clips or T-clips. Start at the outside of the area to be decked. Place your first board and fix it to each joist it crosses using a row of starter clips.

EXTREME TEMPERATURES
Extreme temperature changes could cause the boards to expand or contract. Ensure boards have had sufficient time to acclimatise to the temperature before installing. Do not install in extreme temperatures.
CUTTING
If boards need to be cut to size, ensure the boards are installed and secured immediately after cutting.
Laying the Decking Boards

4
Slot the clips into the groove along the side of the board and screw them into the supporting joists with the screws provided, using one clip for each supporting joist. We recommend you use our stainless steel wood screws offering increased wear and less corrosion. Our T-clips provide a 7mm gap between boards, while the stainless steel clips provide a 3mm gap.

5
Fit your next board by sliding it onto the clips used to secure the first board and fitting another set of clips to secure the opposite side of the board, using one clip for each supporting joist. Follow a similar process to fix subsequent boards. The ends of boards must be fully supported. No overhang or cantilever is advised.

6
At butt joints – where the ends of two decking boards meet – you will need to ensure that each board is held in place with its own clip where they meet. Please ensure you leave adequate gaps for expansion and contraction of the boards, in most cases this will need to be at least 7mm. Please view the temperature guide on page 4 for more information.
HAVE YOU THOUGHT OF TRYING A
DIAGONAL PATTERN?
Why not transform your space by installing in a diagonal pattern? This pattern is great for walkways or for the more compact decking areas, as it can elongate the space.
Simply lay the boards at a 45-degree angle to the joists, or build the joists to a 45° angle within the frame. When using a diagonal design, the joists must be no more than 250mm apart.


7
Having fastened your boards, all that remains is to tidy up the sides of your new deck with our composite skirting or fascia boards, which can be used to hide the unfinished ends of boards and supporting joists.

8
Our hollow decking end caps are used to seal off the ends of hollow core Signature decking boards to give your decking a professional finished look. End caps are available in the same colours as all our Signature boards. Apply them to neatly complete your decking project.
RAISED DECKING AREA
Steps and a raised decking area can be included into your design using upright posts to support the raised framework.
This will completely transform your decking space into a dynamic, relaxing outdoor area.

Composite and Timber Framework

1
Boards must not be laid directly on the ground but should be fixed to the joists. The maximum recommended space between joist rows depends on the angle at which you intend to lay your boards in relation to the joists. The space should never exceed 400mm, please see diagram. Composite joists should be screwed into the concrete base.

2
A gap of at least 15mm should be left between the ends of joists and a fixed object such as a wall, and at least 7mm between the ends of joists at butt joints. These allow for proper drainage and temperature expansion.

3
A starter clip needs to be fixed to the end of the composite joists before laying the first board. Place these at the end of each joist where you will start to lay your boards, ensuring there is a 15mm gap between the decking and the wall to allow for expansion.

4
Our composite boards are easily fastened to the joists of a supporting substructure with the help of our stainless steel screws and clip system. Start at the outside of the area to be decked. Place your first board and fix it to each joist it crosses using a row of starter clips.
EXTREME TEMPERATURES
Spacing guidelines for butt joints:
- 7mm spacing at temperatures of 5°C and below
- 6mm spacing at temperatures between 5°C and 15°C
- 5mm spacing at temperatures of 15°C and above
CUTTING
If boards need to be cut to size, ensure the boards are installed and secured immediately after cutting.

5
Slot clips into the groove along the side of the board and screw them into the supporting joists with the screws provided, using one clip for each supporting joist. We recommend you use our stainless steel wood screws offering increased wear and less corrosion. Our T-clips provide a 7mm gap between boards, while stainless steel clips provide a 3mm gap.

6
Fit your next board by sliding it onto the clips used to secure the first board and fitting another set of clips to secure the opposite side of the board, using one clip for each supporting joist. Follow a similar process to fix subsequent boards. The ends of boards must be fully supported. No overhang or cantilever is advised.

7
At butt ends, where two decking boards meet, ensure each board is held in place with its own clip. Allow adequate spacing at both parallel edges and butt joints to allow for expansion and contraction, in most cases this will need to be at least 7mm. When using a hollow Signature composite board, you will need end caps to seal the ends. Please view the temperature guide section for more information.

1
A timber substructure must be installed onto a raised frame over grass, with weed mat underneath. Timber posts should be secured at a maximum of one-metre intervals around the edges of the frame. The maximum recommended space between joist rows depends on the angle at which you intend to lay your boards in relation to the joists, but should never exceed 400mm, please see diagram.

2
Apply deck tape to the top surface and cut ends of the timber joists to protect them from moisture. Starter clips need to be fixed to the end of the joists before laying the first board. Place these at the end of each joist, leaving a gap of 15mm between the wall and the starter clip to allow for expansion.
Joist Hangers: If you are using 50mm joist hangers, install using 30mm square twist nails. 12mm bolt holes are also included in the Hangers for added stability. The hanger depth must be at least 60% of the depth of the supported member to prevent rotation unless additional lateral restraint is applied to the top of the supported member.

3
Our Signature composite boards are easily fastened to the joists of a supporting substructure with the help of our stainless steel screw and clip system. Start at the outside of the area to be decked. Place your first board and fix it to each joist it crosses using a row of starter clips.

4
Slot clips into the groove along the side of the board and screw them into the supporting joists with the screws provided, using one clip for each supporting joist. We recommend you use our stainless steel wood screws offering increased wear and less corrosion. Our T-clips provide a 7mm gap between boards, while stainless steel clips provide a 3mm gap.

5
Fit your next board by sliding it onto the clips used to secure the first board and fitting another set of clips to secure the opposite side of the board, using one clip for each supporting joist. Follow a similar process to fix subsequent boards. The ends of boards must be fully supported. No overhang or cantilever is advised.

6
At butt joints – where the ends of two decking boards meet – you will need to ensure that each board is held in place with its own clip where they meet. Please ensure you leave adequate gaps for expansion and contraction of the boards, in most cases this will need to be at least 7mm. Refer to the temperature guide under the 'Double Joists, Temperature Expansion and Natural Weathering' section for more information.
EXTREME TEMPERATURES
Extreme temperature changes could cause the boards to expand or contract. Ensure boards have had sufficient time to acclimatise to the temperature before installing. Do not install in extreme temperatures.
CUTTING
If boards need to be cut to size, ensure the boards are installed and secured immediately after cutting.

7
Having fastened your boards, all that remains is to tidy up the sides of your new deck with composite skirting or fascia boards, which can be used to hide the unfinished ends of boards and supporting joists.

8
Our hollow decking end caps are used to seal off the ends of hollow core Signature composite to give your decking a professional finished look. End caps are available in the same colours as all our Signature composite boards. Apply them to neatly complete your decking project.
BULLNOSE FRAMING
Signature composite bullnose boards are intended for use as borders around your Signature composite decking area. Due to natural batch variations and the timber within the boards, they are not designed to blend seamlessly with the rest of your decking area.
For an enhanced aesthetic, we recommend choosing a contrasting colour to create a picture frame effect.

Finishing Your Decking
CHOOSING THE RIGHT TRIMS
Made with the same composite material and colours as our Signature decking boards, Cladco Signature bullnose boards, fascia boards, skirting trims and corner trims can all be used to finish your project to a high-end standard.
Fascia boards can be fitted to the exposed joists, hiding the base below and the underside of the deck. Corner trims can be installed over corners to create a neat finish, and bullnose boards can round off the outside edge of a decking area.


HOW TO INSTALL BULLNOSE BOARDS
Using SPEEDDEKZ 65mm screws, insert at an angle through the supporting joist underneath the board. Ensure the bullnose board is supported along the length with joists and a screw inserted into each one. Two screws are recommended across the width of the board at regular intervals, inserted 13mm from the edges of the board. After securing the front of the board, secure the centre into the joist below, followed by the end of the board. We recommend using 11 Screws for every 4m board, with T-clips or stainless steel clips secured in the grooved edge of the Signature composite bullnose board.

HOW TO INSTALL FASCIA BOARDS, SKIRTING OR CORNER TRIMS
Using 50mm SPEEDDEKZ decking screws, fix the ends of fascia boards or corner trims to the joists or boards behind. Ensure the screws are inserted 13mm from the edge of the fascia board or trim. Continue fixing 300mm after each screw. Alternatively, you can use a strong adhesive, such as Cladco adhesive, to secure the boards or trims. For optimum results, alternate between screws and adhesive every 150mm until the board or trim is fastened securely.
Expansion Gap: When installing Signature composite skirting trims, corner trims, fascia boards and bullnose boards, please allow an adequate expansion gap of up to 8mm to account for natural movement.

FASCIA BOARDS
Once the bullnose boards have been installed, you may wish to add the matching fascia boards to the decking installation. Fascia boards can be fitted to the exposed joists, hiding the base below and the underside of the deck.
CLADCO ADHESIVE
When using Cladco adhesive, do not allow the adhesive to get on the decking boards, as this can damage the finish of your decking.
END CAPS
End caps are used to seal the ends of hollow Signature composite decking boards. They may require sanding due to being a tight fit. Ensure the end caps are not forced into place as this may cause them to snap.
Aftercare and Maintenance
SIGNATURE COMPOSITE DECKING MAINTENANCE
It is important to keep your Signature composite decking clean and free from debris and dirt to ensure a long-lasting decking area.
To keep your Signature composite decking well maintained, we advise avoiding:
- Dragging furniture or plant pots across the decking.
- Dropping heavy items onto the decking (such as large plant pots, trees, BBQs and furniture etc).
- Using items with metal feet without a suitable padding material between the feet and the decking to avoid scratching or damage.
- Using corrosive or strong chemical treatments, such as bleach, or allowing contact with substances like suntan lotion or insect repellent, as this may cause discoloration. Please note that Cladco ultimate decking cleaner contains a small percentage of bleach and should be used with caution, as prolonged or excessive exposure may affect the colour or woodgrain finish.
As a composite material, Cladco Signature composite decking boards will naturally accumulate dirt when exposed to outdoor conditions. For everyday debris such as plants, leaves, berries, or animal droppings, simply brush your decking with a broom and warm, soapy water.
FIRE AND HEAT SOURCES
Precautions should be taken when using fire pits and BBQs on Signature composite boards. We advise a protective surface is laid between the fire pit or BBQ and the decking. You should ensure the fire pit or BBQ is secure and does not wobble or move. Caution should be taken with embers coming into contact with the decking. Cladco cannot be held responsible for any fire damage or flames that come into contact with the decking. To use a heat source near the decking is entirely at the risk of the customer.
MOULD AND MILDREW
Mould and mildew are common in outdoor environments. The climate will affect how mould grows, depending on temperature and moisture levels. To minimise mould growth on your decking, ensure mould is removed often. If mould is present, use soapy, hot water or decking cleaner to remove. In cases of more stubborn dirt or grime, pressure washing may be necessary to restore the appearance of the decking.
SNOW AND ICE
Take care when walking on your decking in extreme weather conditions, such as snow or ice, as it may become slippery.
If using de-icer, ensure it contains calcium chloride, which will not damage your decking. It may leave a slight residue but this can be easily cleaned away. Always test chemicals on an inconspicuous area of your decking.
Avoid grit or sand, as well as metal or plastic spades, on your decking as they may scratch the surface.
1
Use a broom to remove any debris, such as leaves, from the decking to create a clear surface ready for cleaning.
2
Prepare a bucket of hot soapy water or grab a bottle of Cladco ultimate decking cleaner.
3
Apply the hot soapy water or cleaner to your decking. Once applied use a broom to scrub the surface of the decking. Any surface debris will start to lift off.
4
Leave the hot soapy water or cleaner on the surface for 60 minutes before rinsing. Ensure all cleaner, soap and debris have been successfully removed from the boards before leaving to dry.
FAQs
Cladco Signature composite decking is very practical for any outdoor space (subject to building control and a structural framework). The decking boards can be installed on grass, soil or concrete, provided a suitable frame has been created below.
A pressure washer can be used to clean your Signature composite decking area. We recommend using a pressure washer with a psi of no greater than 2,000. A fan tip should be used with a 40-60° spread, keeping the head 250-300mm away from the surface. Please note that using pressure washers may increase the chance of screw holes becoming more visible. Always test over an inconspicuous area first. Direct, prolonged pressure washing could damage the surface of the boards and should be avoided.
As with all composite products exposed to the sun, they can become hot over prolonged periods. Darker colours can feel hotter in areas exposed to direct sunlight, and so footwear may be necessary in these circumstances. Special caution should be taken when using decking in areas with prolonged sun exposure and next to glass.
When using a fire pit or patio heater, it is always recommended to test this with an offcut of a board first. Any embers or heat that come into contact with the boards should be removed immediately. Embers or heat may damage the integrity of the board and cause marks to the surface.
Yes, but only where the edge is only aesthetic, such as a balcony edge, if this is your preferred finishing option. However, where the edge is likely to sustain impact, such as a step, we do not recommend using a standard board. Signature bullnose edging boards have been specifically designed with high impact in mind and as such have a thicker surface to withstand the knocks and scrapes associated with step edges and other applications.
A single 4m Signature solid composite decking board weighs approximately 20.92kg, whereas the 4m hollow board equivalent weighs approximately 11.2kg. A single 2.4m Signature solid composite board weighs approximately 12.55kg.
Unlike traditional timber decking, Signature composite decking boards are available in a range of colours in a narrow groove or woodgrain finish, designed to match or contrast existing buildings and architecture.
Our Signature decking boards are designed to replicate the natural appearance of timber while eliminating the need for regular maintenance. The pigments used in the manufacturing process may react differently with the timber content in each board, resulting in variations in shade. This is also the case with our decking trims, as they are made with the same composition.
Signature composite decking requires time to acclimatise to outdoor environments. During the stabilisation period of around six months, sections of your decking that are not exposed to weathering, such as areas under furniture, will not weather at the same rate as the rest of your decking. If you expose these areas to the natural elements, they will gradually even out in colour as the previous boards have.
As with most outdoor garden products, composite decking can become warm if exposed to direct sunlight, especially in the darker colour ranges.
No. While our Signature composite decking requires significantly less upkeep that traditional timber decking, it is not entirely maintenance free. Cleaning is necessary to remove debris and prevent potential staining. If your decking is situated beneath overhanging trees, keep an eye out for leaves, petals, and sap. This will need to be cleared promptly to avoid marking the surface of the decking.
Watermarks are a common occurrence during the weathering process of composite products. As the tannins in the timber content of the boards come out, watermarks may appear. This is a temporary condition, and the marks will fade naturally as the decking stabilises over time.
Signature composite decking boards are susceptible to scratching, particularly if furniture is dragged across the surface. To minimise the risk of damage, we recommend attaching felt pads to the legs of furniture.
Due to the porous nature of composite decking, prolonged contact with plant pots may cause staining. We recommend placing a mat underneath any pots to prevent this. This precaution should also be taken for other garden furniture.
If you choose to go for one of our lighter colours, such as Ivory, your Signature decking is more likely to show dirt. To avoid this, you may need to clean your decking more often than if you were to choose a darker colour.
Cladco Signature composite decking will naturally expand and contract with changing temperatures. To account for this, it is essential to follow our recommended guidelines when installing Boards, particularly where two Boards meet end-to-end at butt joints. The spacing guidelines are detailed in the text above.
Yes, our Signature boards have two sides: one with narrow grooves and the other with a woodgrain effect. For low-slip properties, install with the narrow grooves facing up.
For a sophisticated and professional finish, Cladco Signature composite bullnose boards are easy to install, see our guide above. Please note that bullnose boards are intended for use as borders around your decking area. Due to natural batch variations and the timber within the boards, they are not designed to blend seamlessly with the rest of your decking.
For an enhanced aesthetic, we recommend choosing a contrasting colour to create a picture frame effect.
Cladco Signature composite decking is simple to install. Please see our easy-to-follow installation guide above, depending on your choice of joists and ground type.
For Signature decking boards, we offer a T-clip system to allow for expansion and contraction of the boards and starter clips for the beginning of installations. For more information on installation, please visit our installation section.
Our Signature boards consist of 60% recycled timber. Due to the natural properties of timber, the boards expand and contract with temperature changes. Leaving appropriate expansion gaps between boards allows for this movement, reducing the risk of warping or splitting caused by restricted space.
Adequate board spacing also facilitates cross ventilation, ensuring the longevity and stability of your decking.
When our Signature boards expand and contract, they must be securely fastened to minimise movement. A single joist may not provide enough support for this. Adjoining boards should never share the same clip, and should be secured using two clips per board end, with double joists. This method will improve the structural integrity of your decking; especially in high-stress areas like the ends, where foot traffic, weathering and material contraction or expansion increase the strain on your decking.
We recommend using Cladco Adhesive to attach Signature composite trims to your decking. It is advisable not to install composite trims in hot temperatures. To ensure a secure finish, trims should be clamped in place for up to 24 hours during installation.
To install our decking end caps, you will need to lightly sand the edges of both the board and the end cap to create sufficient friction for a secure fit.
Like any composite product, decking boards undergo a stabilization process, during which they may fade slightly to reach their final colour. This process typically occurs within the first six months after installation and is particularly noticeable in woodgrain ranges, where the sanding process may cause variations in shading.
Our Signature composite boards are designed to replicate the natural appearance of timber while eliminating the need for regular maintenance. The pigments used in the manufacturing process may react differently with the timber content in each board, resulting in variations in shade. This is particularly noticeable between the 2.4m and 4m boards. The same applies to our decking trims, as they are made using the same composition.
Mould or mildew may develop over time due to airborne spores in outdoor environments. Use a suitable deck cleaner for effective management. Ensure adequate drainage, airflow, and spacing during installation to help prevent mould. Regular maintenance will keep your deck in optimal condition.
Installation Video
Discover our range of Signature composite decking online today.
